

 WishLists
 My Account


Every store has a discount section filled with dented, scratched, or outdated frames. Pick up a bunch of those frames for just dollars and transform them into festive decorations for any holiday. This skull Halloween frame is the perfect accent for your October decor and can be done for under $10 in supplies. It all started with a cheap, $1 frame, a little acrylic paint, and a bag of skull buttons I found at my local craft supply store. If you use craft glue instead of a glue gun, you could even get the kiddos involved in this project.
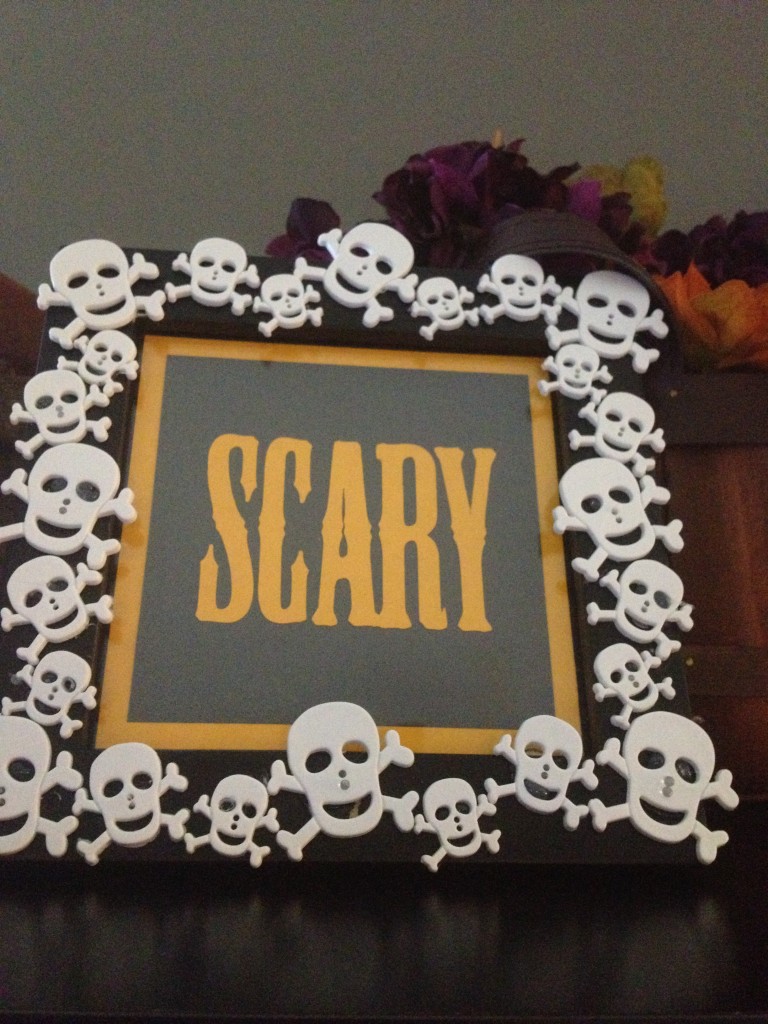
Skull Halloween Frame
Supply List
- Frame
- Black Acrylic Paint
- Paint Brush
- Skull Buttons
- Glue
Step 1:
Start with a cheap frame that you found at the dollar store or the clearance section of your local home goods store. Remove the glass and the back from the frame. Pour some black acrylic paint out on a paper plate or paint pallet and paint the frame with a thin coat of black paint. Allow the paint to dry and then apply a second coat. Depending upon how thin your coats are, a third coat may be needed.
Step 2:
Once all coats of black paint are dry, get out the skull buttons and your glue. You can use any strong craft glue, but I used a hot glue gun for this project. Start in the center and work your way out to the corners. I made sure that the buttons were applied symmetrically around the frame but you could also do a more carefree application of the buttons.
Step 3:
Cut some cardstock down to size and use some spooky letter stickers to create a message for the inside of the frame. Insert the glass, paper, and back again and you are ready to decorate with it.
If you want to try this project at home, print out this step-by-step tutorial.Skull Halloween Frame
About Philip Travers
Twitter •
