

 WishLists
 My Account


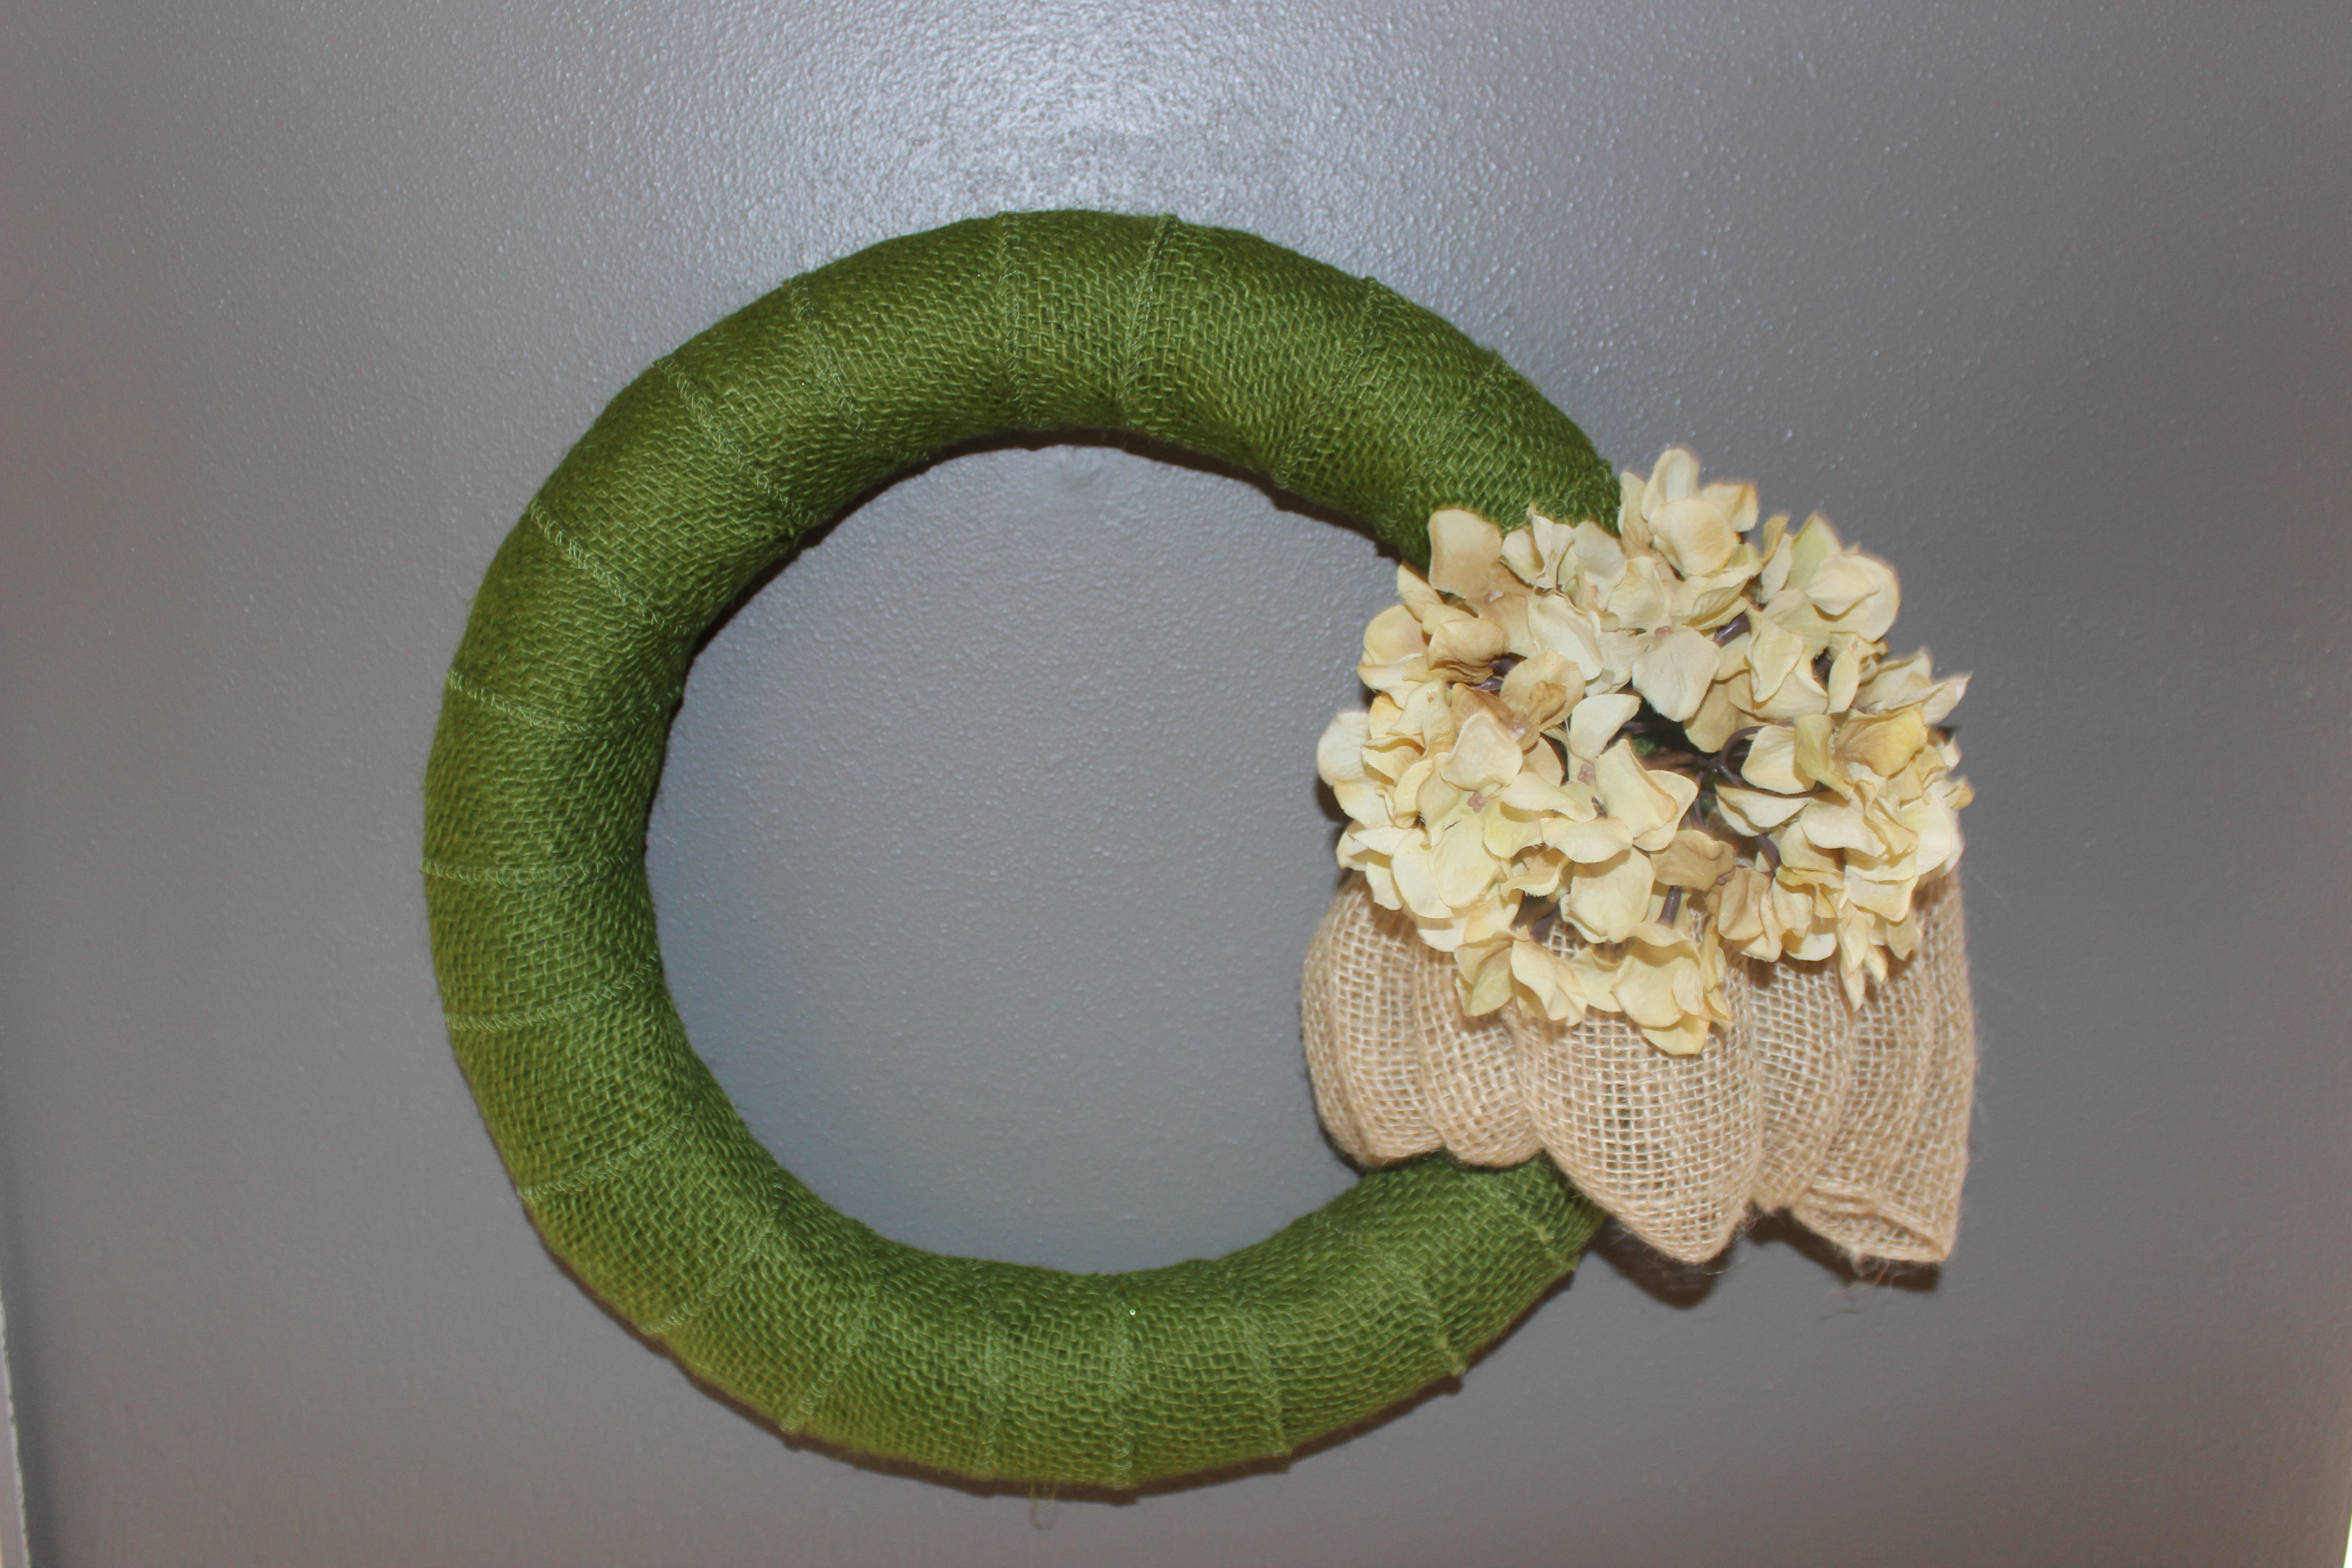
We love quick and stylish projects and we have a great new video tutorial for you today. A wreath form and some beautiful ribbon is all you need to create a great DIY Spring Wreath. Wreaths are an absolute staple in any home and making your own can be relaxing and fun. Check out our step-by-step tutorial and then watch the video below to see how easy it is to make this stylish ribbon-wrapped wreath. We used burlap ribbon but you can do this same process using any style of ribbon you want.
Supplies:
- Foam Wreath Form
- 1 Spool Burlap Ribbon
- Floral Wire
- Wire Cutters
- Accent Ribbon
- Artificial Flower
Step 1:
Make your own floral pins by cutting 2-inch lengths of floral wire and folding them in half over your finger.
Step 2:
Unroll your ribbon and secure the end of the ribbon to the back of a wreath form. Use two to three floral pins to secure the end. If you want a more permanent option, hot glue would work just as well.
Step 3:
Start wrapping the ribbon around the wreath form, leaving about two inches every time the ribbon overlaps. Every three wraps, secure the ribbon to the back of the wreath form with another floral pin.
Step 4:
When you cover the entire wreath form, trim the end of the ribbon and secure it to the back of the wreath form using two or three floral pins.
Step 5:
Flip over your wreath so it is right side up and add a beautiful artificial flower using a length of florist wire. Finish off your DIY burlap ribbon wreath with a beautiful DIY bow right under the flower.
Hang your wreath on the wall and give yourself a pat on the back for completing this fun spring project.
About Philip Travers
Twitter •
