

 WishLists
 My Account


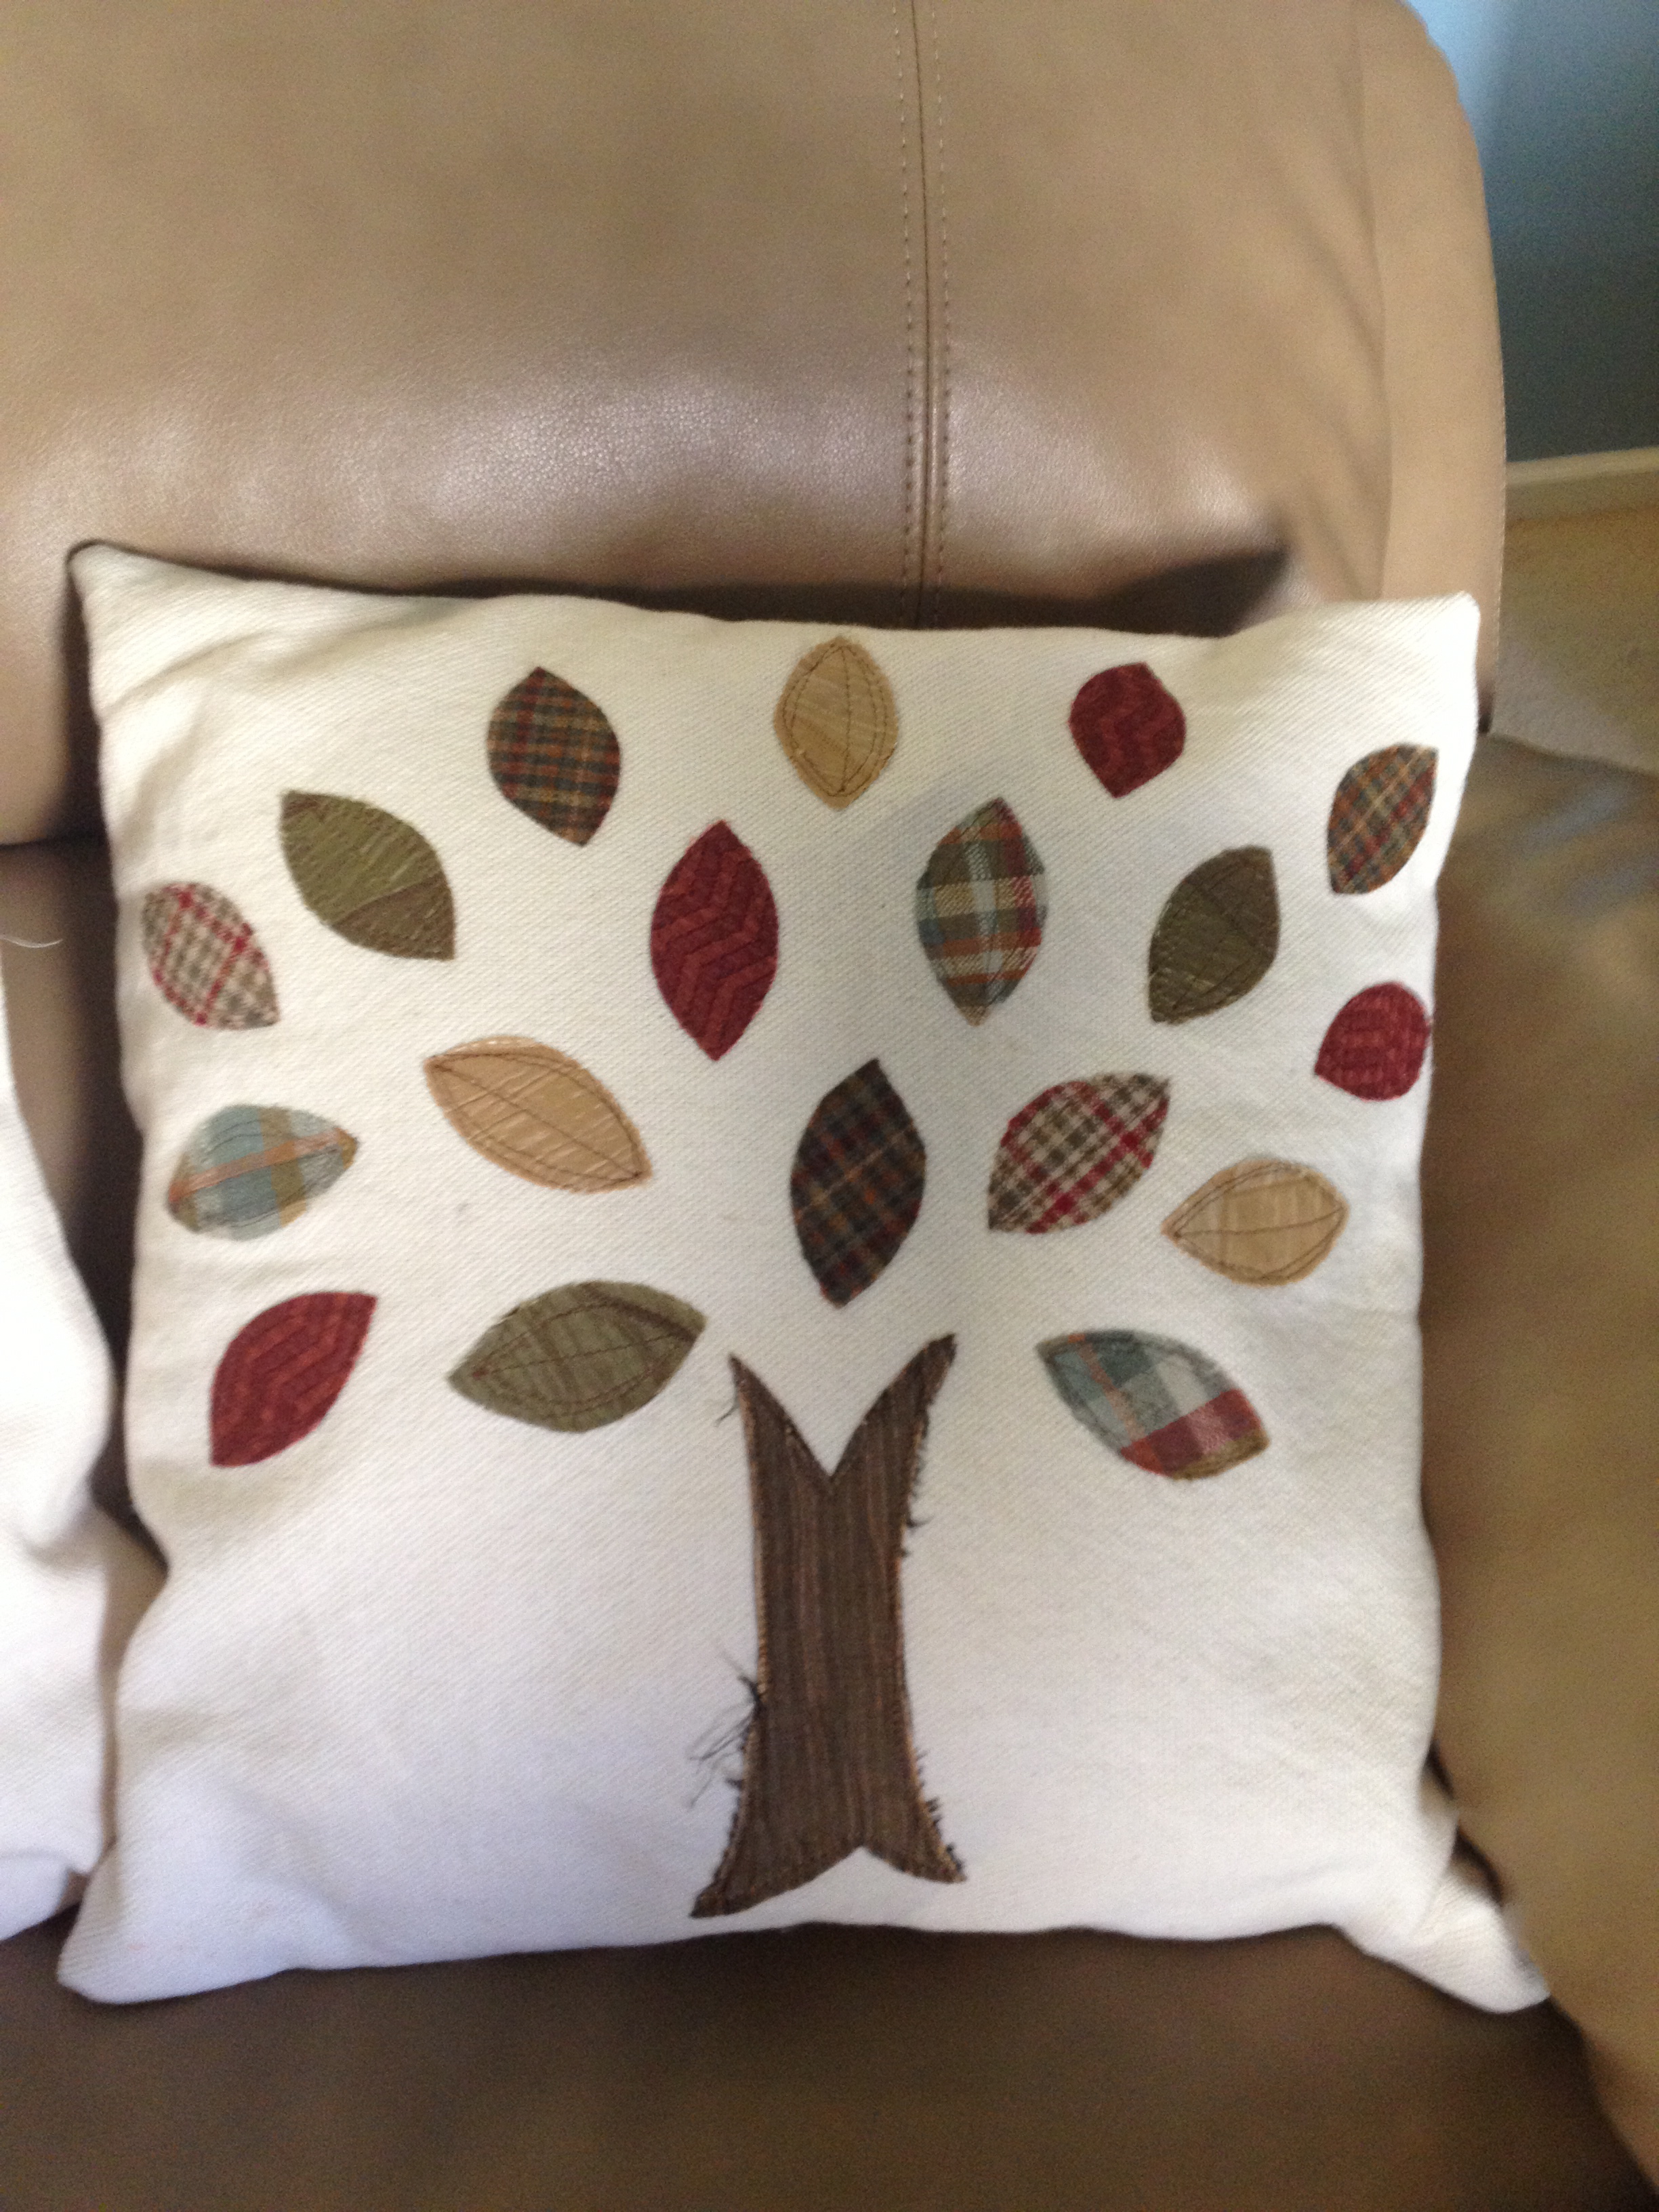
If the leaves changing colors is your favorite aspect of fall, you will love this easy home decor project. This DIY fall applique pillow is a great project for someone who has never tried to applique before because it is so easy to complete. This project is also a great way to reflect the beautiful flowers in your home because you could always do an applique version of your favorite plant on the outside of a throw pillow. Go ahead and print out the Fall Applique Pillows Tutorial with step-by-step pictures and keep it on hand for future use. You by no means have to be an expert sewer to complete this project. This project is so easy that my 5-year old girls even got involved with pressing the pedal as I sewed.
Fall Applique Pillow
Supply List
- Canvas Fabric
- Pillow Form
- Heat & Bond
- Scraps of Fabric
- Velcro
- Thread
- Sewing Machine
Step 1:
Measure your pillow form. This measurement will help you to determine how big to cut your canvas. The front of your pillow should be one inch larger on both sides to allow for a half-inch seam allowance on all sides. My form measured 17 inches by 17 inches so I cut the front of my pillow at 18 inches by 18 inches.
Step 2:
Cut two back pieces for your pillows. These pieces will overlap in the center back, allowing you to change out the pillowcase with the season. The width of the canvas should measure the same as the front. The trick is in deciding the height. Take the measurement for the front and divide it by two. Mine was 18 so my new number would be 9. Now add three inches, increasing my measurement to 12. Cut two pieces at these new dimensions (18 by 12 inches for this example).
Step 3:
Turn down the two back pieces a half-inch and then another half inch and hem them both. Do not sew the front piece to the two back pieces yet; first you must do the applique work. Start by drawing the shape of a leaf and the outline of a tree trunk on a piece of paper or cardstock.
Step 4:
Iron Heat & Bond onto the back of your scrap fabrics. Heat & Bond is an adhesive that allows you to iron these decorative fabrics directly onto a background fabric, such as the canvas I used here.
Step 5:
Roughly sketch the shape of a leaf and the shape of a tree trunk on a piece of paper. Cut it out and trace those shapes onto the Heat & Bond on the back of your decorator fabrics. Go ahead and cut out your pieces. I had a single trunk and 18 leaves.
Step 6:
Peel off the back of the heat and bond and place the pieces where you want them on the front piece of your canvas. When you are happy with how they are arranged, iron them on in accordance with the directions on the Heat & Bond package. Stitch around the edge of each piece for extra security.
Step 7:
With Right sides together, pin the front of your pillow to the two back pieces of your pillow. The hemmed edges of the back of your pillow should overlap. Stitch the whole way around your pillow, clip any threads, and turn the pillows right side out. Add your self adhesive Velcro to the overlapping flaps in the back and fill your new pillowcase with your pillow form.
Variation:
This same technique can easily be used for other times of the year. I used the same leaf shape and a turkey body to make a festive Thanksgiving pillow but you could easily add snowflakes or Christmas ornaments to the front of a pillow for the Holidays.
About Philip Travers
Twitter •
