

 WishLists
 My Account


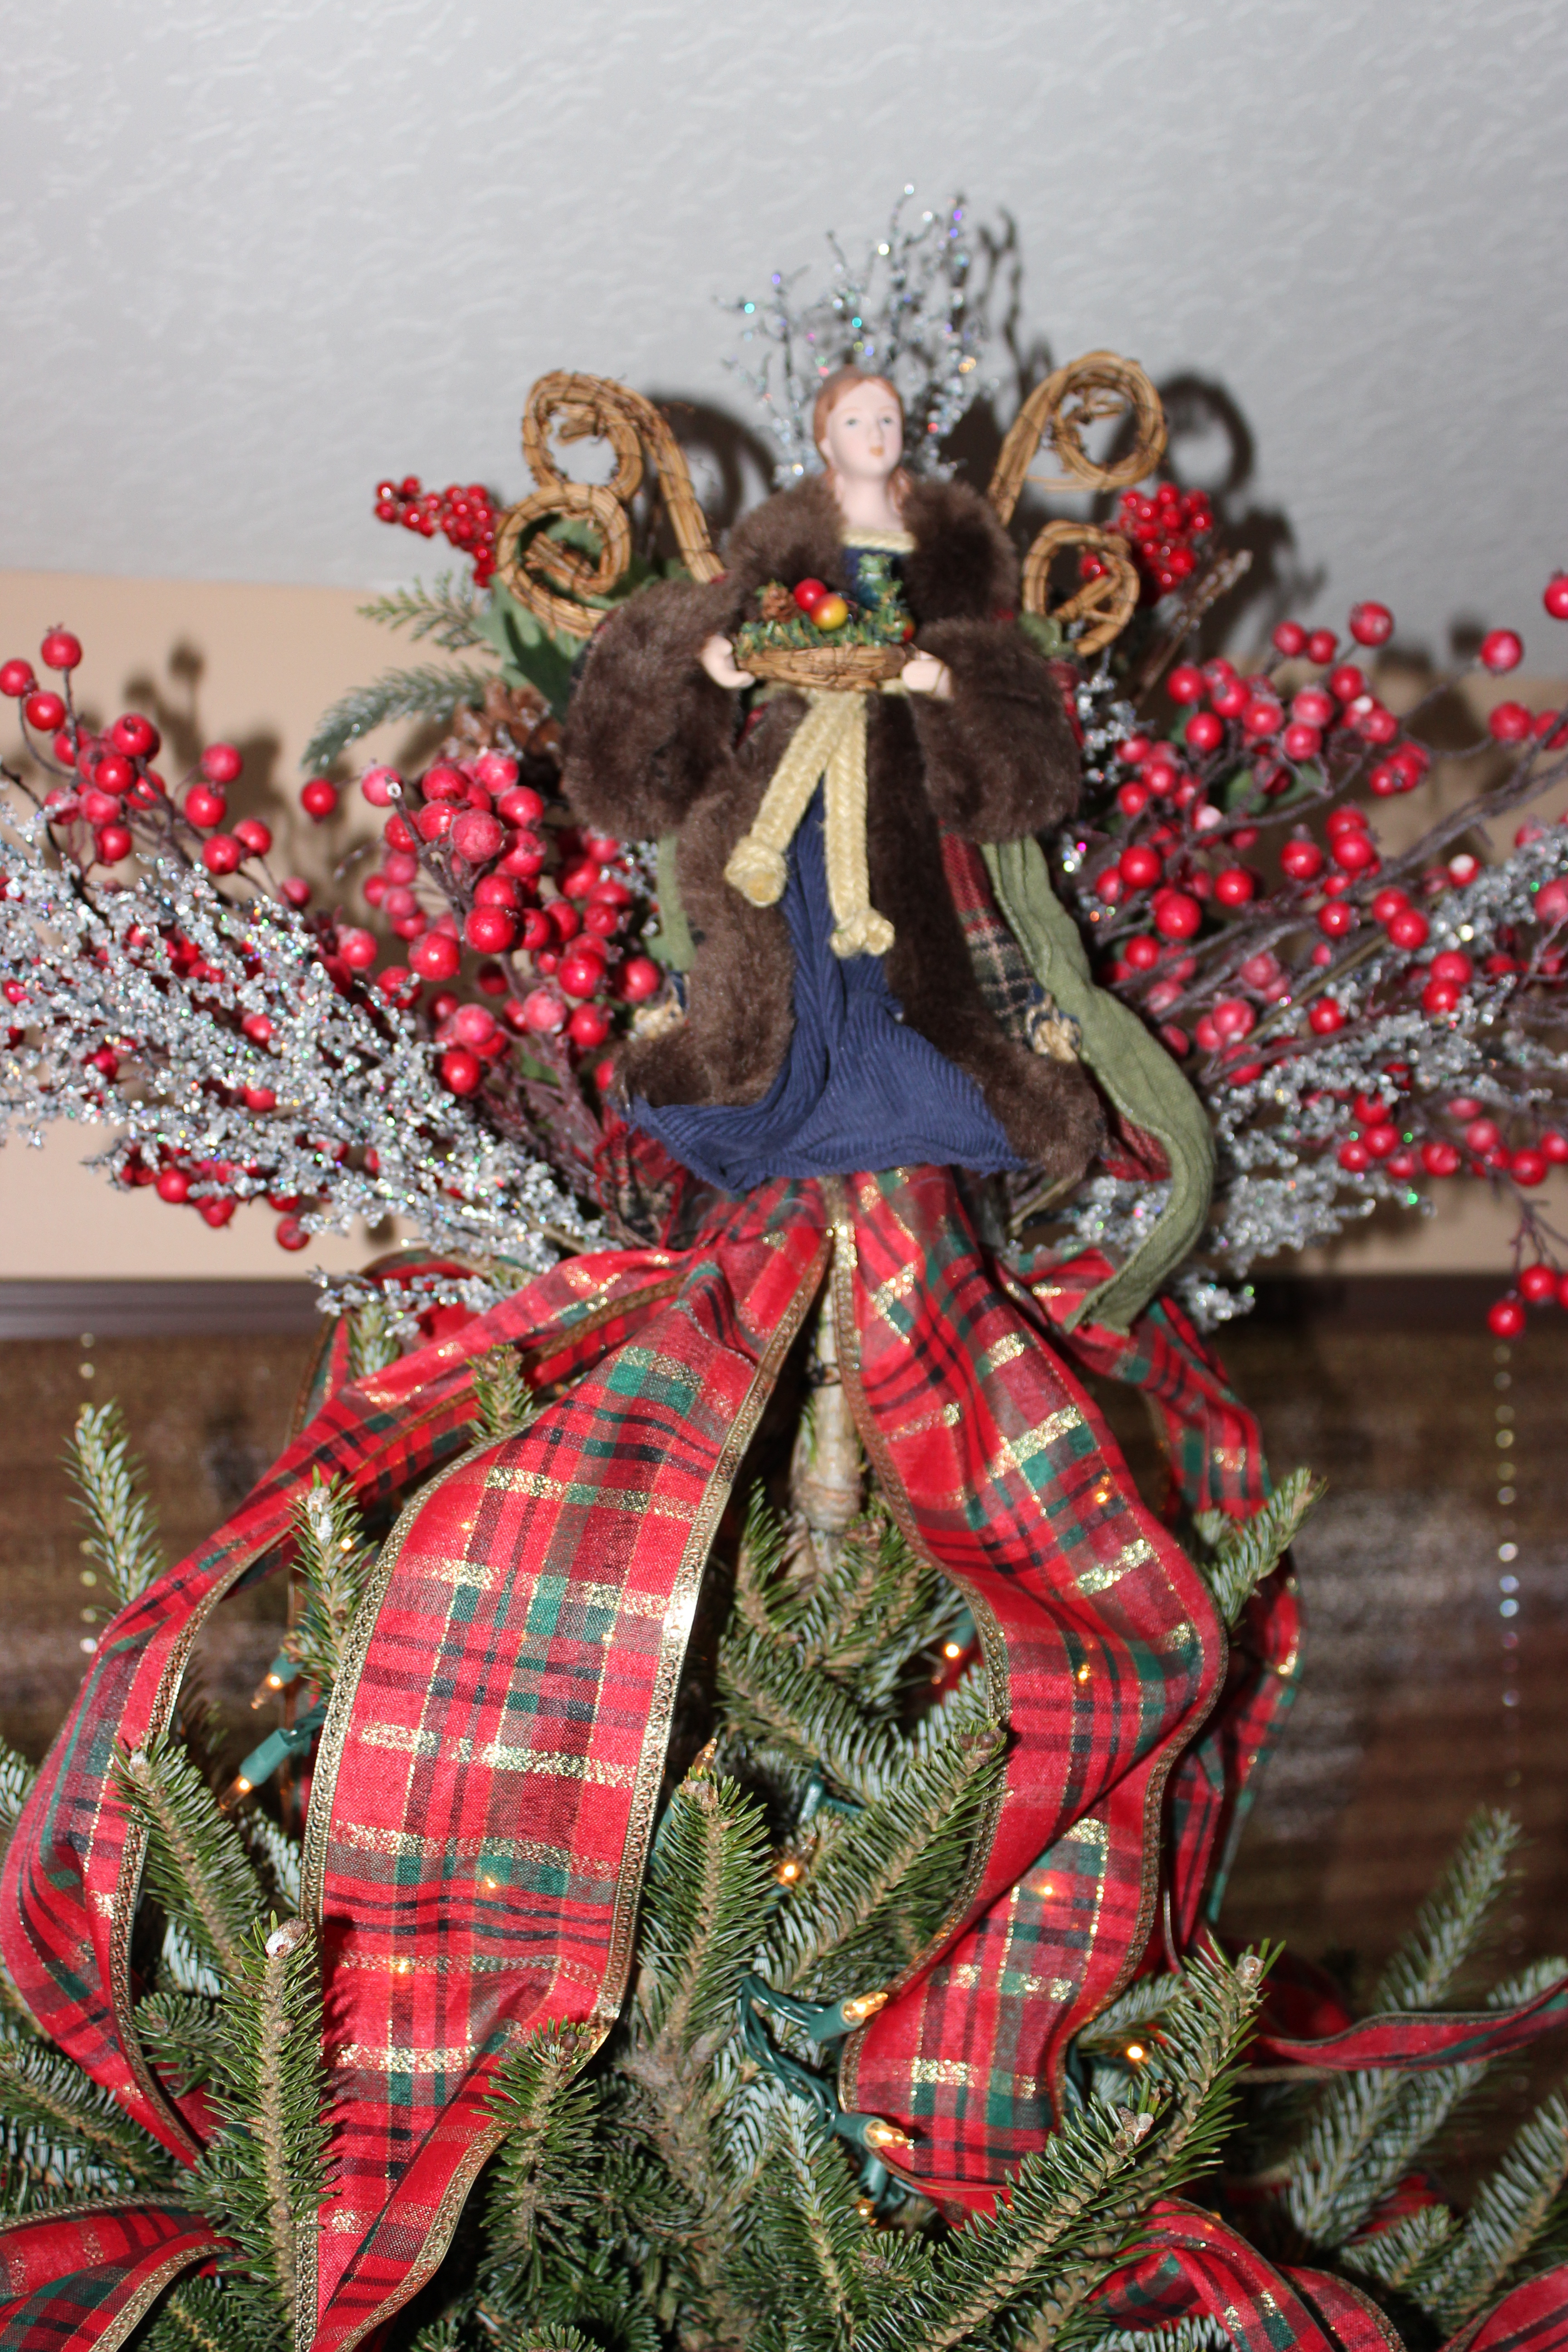
Designing a truly impressive tree topper is about so much more than just selecting an angel, star, or bow. Those designer trees you see on display in fine hotels around the country take things a step farther and add a burst of artificial foliage. You can get that stunning look on your home tree when you follow these quick and easy steps.
Christmas Tree Topper
1. Choose a Topper
Before you can pick your foliage, go ahead and choose a tree topper. In this case, the homeowner chose an elaborate cone angel that is adorned in rustic chic clothing. The color scheme of your central topper will help you dictate the color of the foliage that you choose.
2. Choose Your Foliage
Once your tree topper is chosen, head to your local craft store and and pick up 9 to 11 picks of holiday foliage, glittered spirals, and flowers. Make sure that you have at lest two or three different types of picks, preferably each with a different color or texture.
3. Place the Topper on Your Tree
The first step in creating this look is to place the tree topper on the uppermost branch of your tree. Make sure that your topper is exactly where you want it and facing the direction you want.
4. Add Your Picks
With your topper in place, go ahead and start adding your floral picks behind it. If the top of your tree is not very dense, you may need to secure the pics to the branches with a couple inches of floral wire or some twist ties. As you are placing the picks, fan them out behind your central topper. When you are done, your tree should look something like the one featured in this post.
About Philip Travers
Twitter •
