

 WishLists
 My Account


This is a beautiful and easy project that is fun for all ages. Some simple paper mache eggs get completely transformed and turned into a beautiful basket decoration. These rustic paper mache eggs look absolutely stunning with a simple application of black or white stamps.
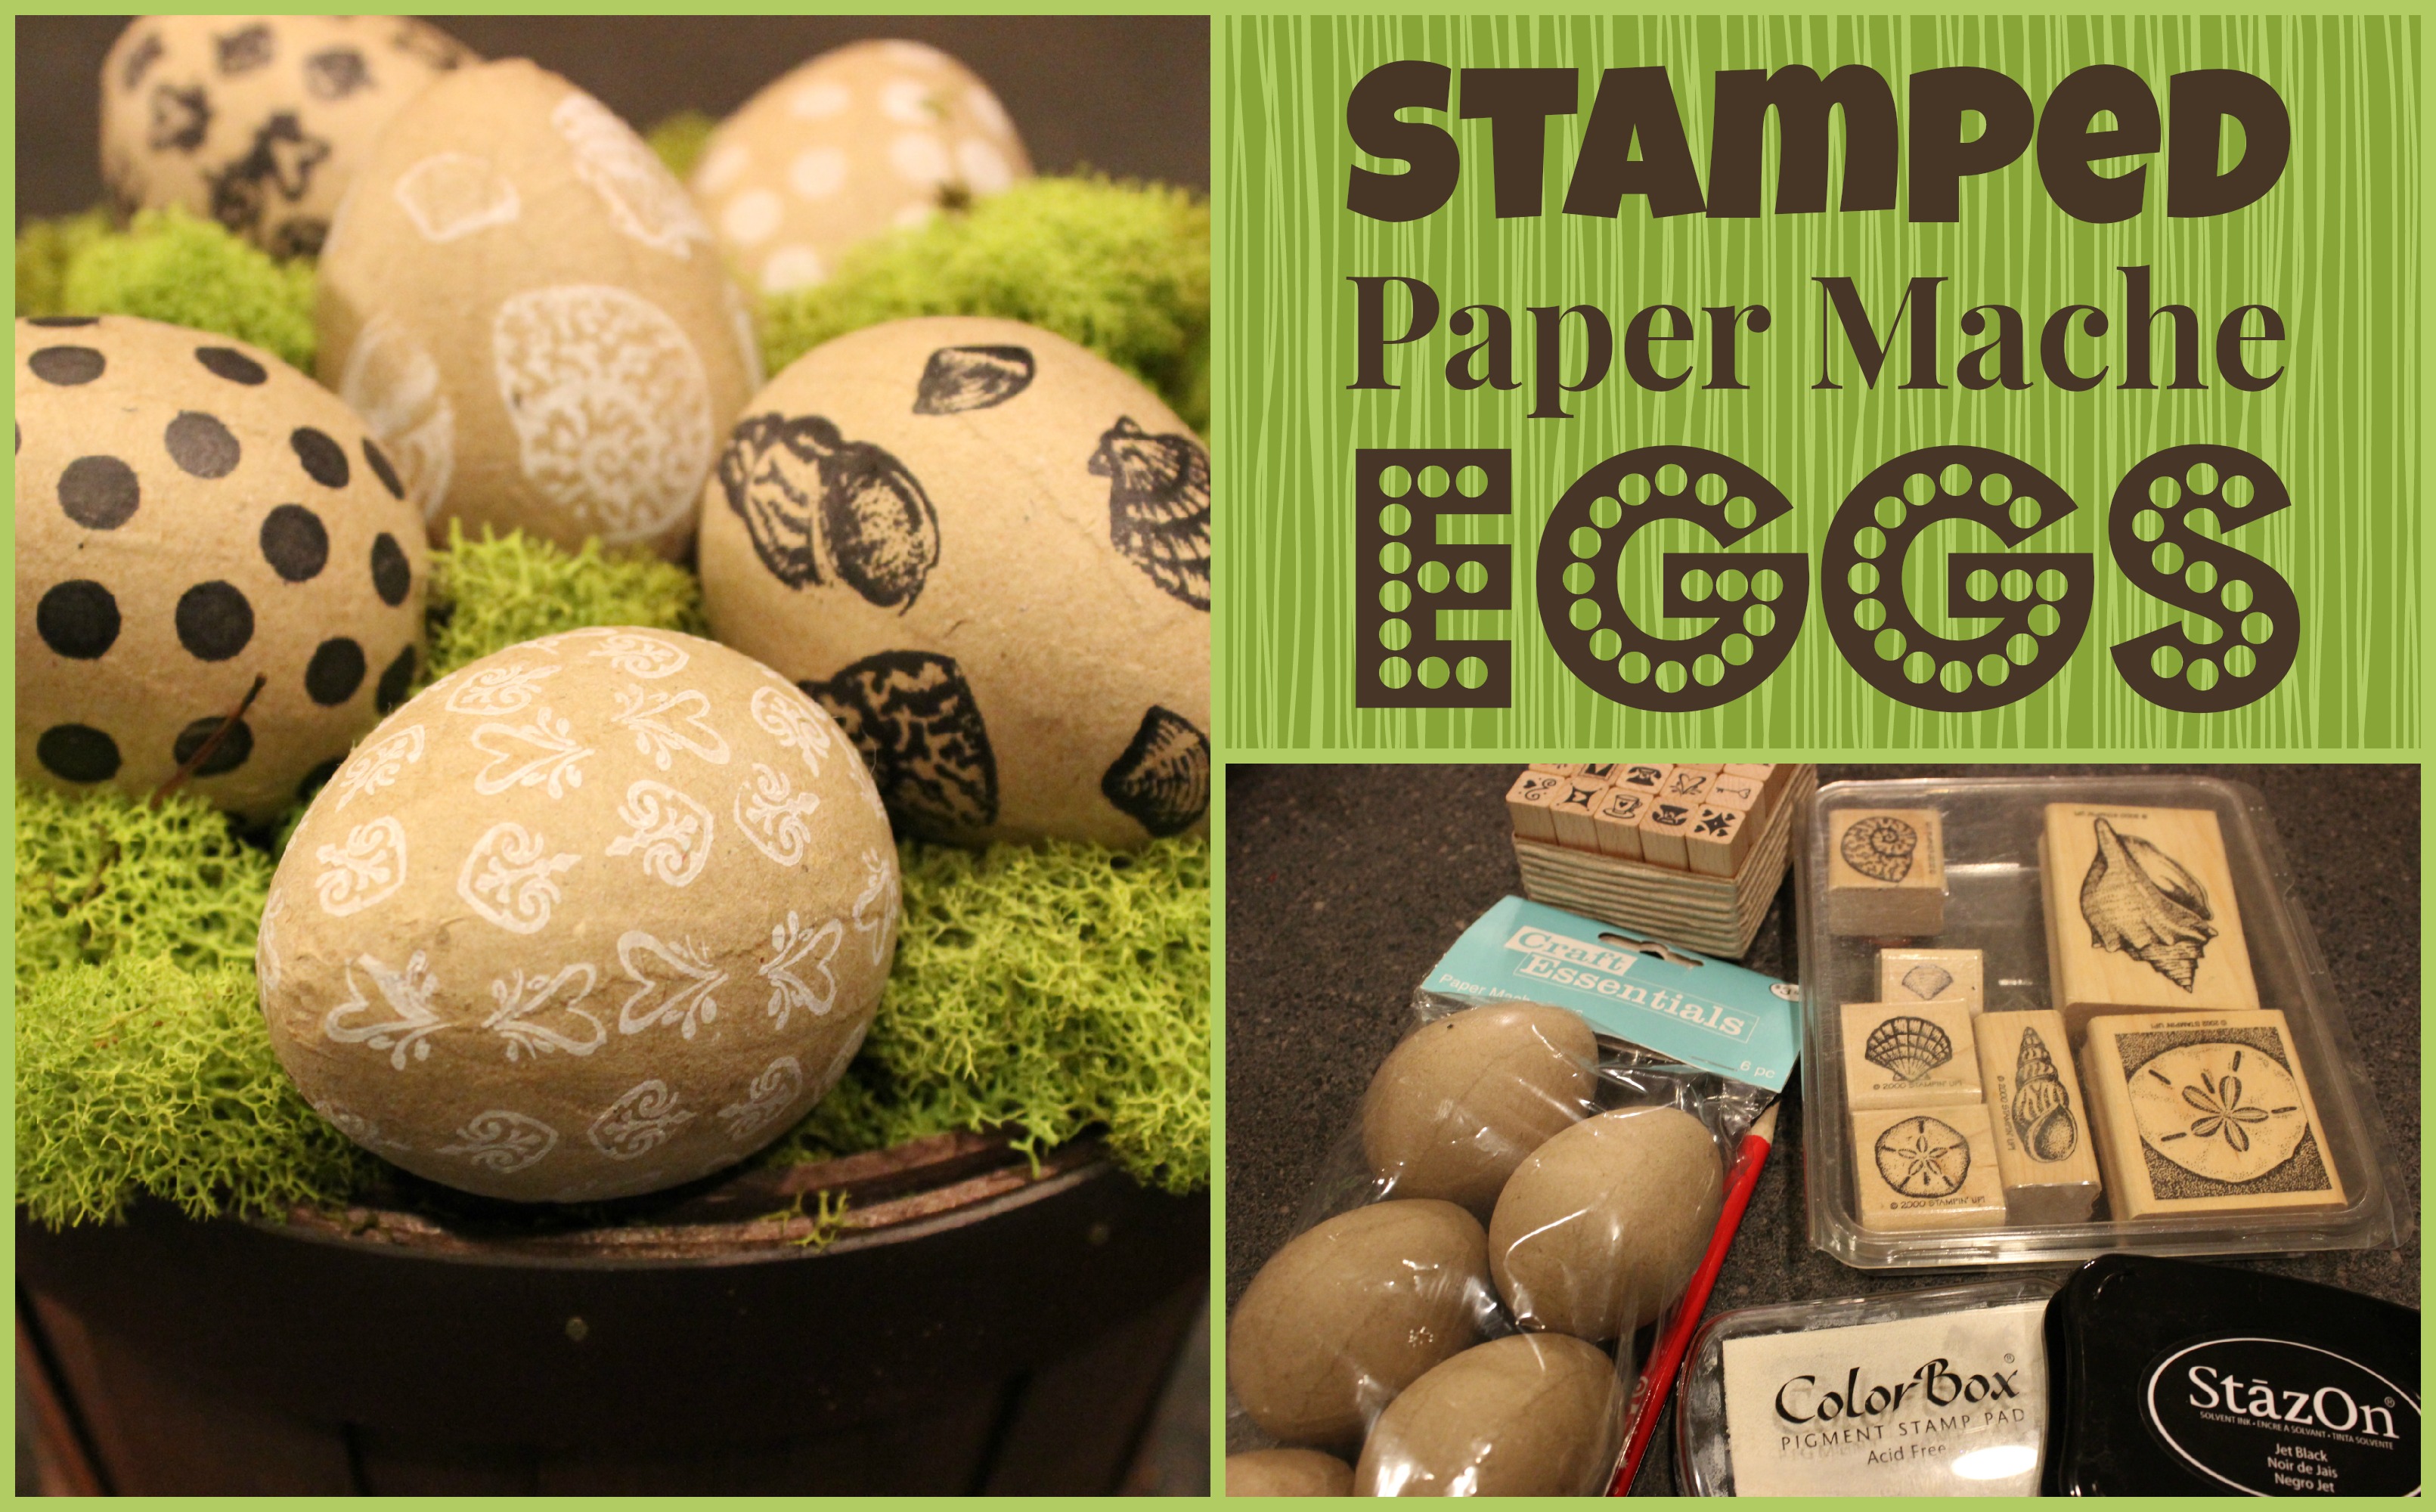
Stamped Paper Mache Eggs
Supplies:
- 6-Pack of Paper Mache Eggs
- Stamp Pads in Your Choice of Colors
- Stamps
- Pencil
- Basket
- Floral Foam
- Package of Moss
Step 1:
Cut down your floral foam to fill the bottom of your basket. Settle the floral foam into your basket.
Step 2:
Cover your floral foam with a layer of your moss. I chose a bright green moss for its contrast of color against the soft brown of the paper mache eggs.
Step 3:
Time to decorate your eggs! I used two different methods to result in three completely different looks. You can pick just one or you can use all three to make a basket with even more interest. The first method I tried was making a polka dotted egg using a stamp pad and the eraser of a new pencil. Just dab the eraser into your stamp pad and press it onto the surface of your egg.
For the other eggs I transferred out my pencil for two sets of rubber stamps. The first set was a beautiful shell assortment that looks just as beautiful in black as it did in white. The second assortment was of much smaller stamps, which I applied in a striped fashion as opposed to randomly. Both results are equally stunning.
Step 4:
Allow your ink to dry and then nestle your eggs into your basket. Once your eggs are placed, take a couple extra pieces of moss and tuck them between the different eggs.
Variations:
This project is one that you can really make your own. Change out the black and white ink pads for colored ones and use the different stamp collections that you already have on hand. These simple changes will yield drastically different results.
About Philip Travers
Twitter •
