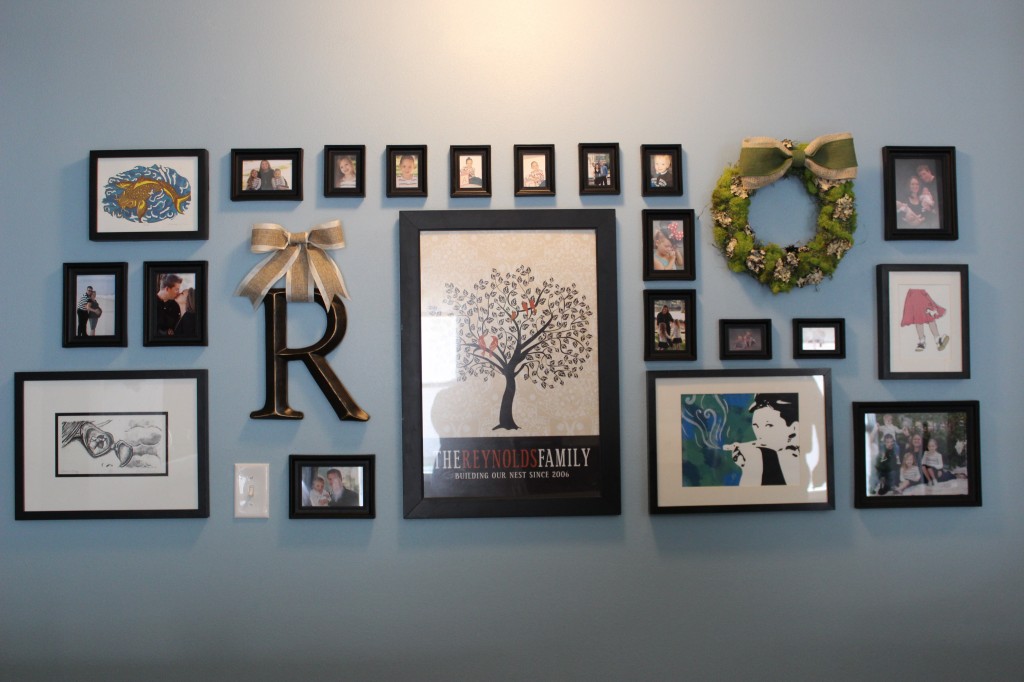
We commonly see wreaths used alone — over a mantle, on the wall above the couch, or anywhere else for that matter. There are other ways that wreaths can be used, however. One of our favorite is in groupings. Photo collages are popular for large walls, but more can be added to them than just photos.
I took a long hallway and turned it into a display of a little bit of everything that I love. It all started with the family tree print in the center and branched out from there. I included favorite family photos, some of my sister’s artwork, the initial of our family name, and a beautiful handmade moss wreath that I made in this YouTube tutorial. If you haven’t seen this one yet, check it out. You won’t believe how easy it was to make this wreath.
Why It Works
The wreath would have looked beautiful on its own but it looks even better when surrounded by these other pieces. It isn’t because it is on the smaller side, it is because it adds a much-needed pop of color to the wall. The other thing that it does is breaks up the linear lines of the frames with a great circular shape. Without the “R” and the wreath, this would all just be one big grid.
Tips for Creating Your Own Groupings
Measure the size of the wall space available. Cut craft paper to that size and lay it on the floor. If it takes more than one width of paper, tape two pieces together. Gather all of the elements you want to use in your collage and start arranging them on top of the craft paper. This may take a while, I know it did for me. Just keep arranging and rearranging until you have the perfect arrangement.
Use a pencil to trace around each of the elements. Put the craft paper back up on the wall with tape and make sure everything looks good before using it as a guide to start hammering nails in the wall. Be sure to show us your wreath groupings!
About Philip Travers
Twitter •


 WishLists
 My Account


