

 WishLists
 My Account


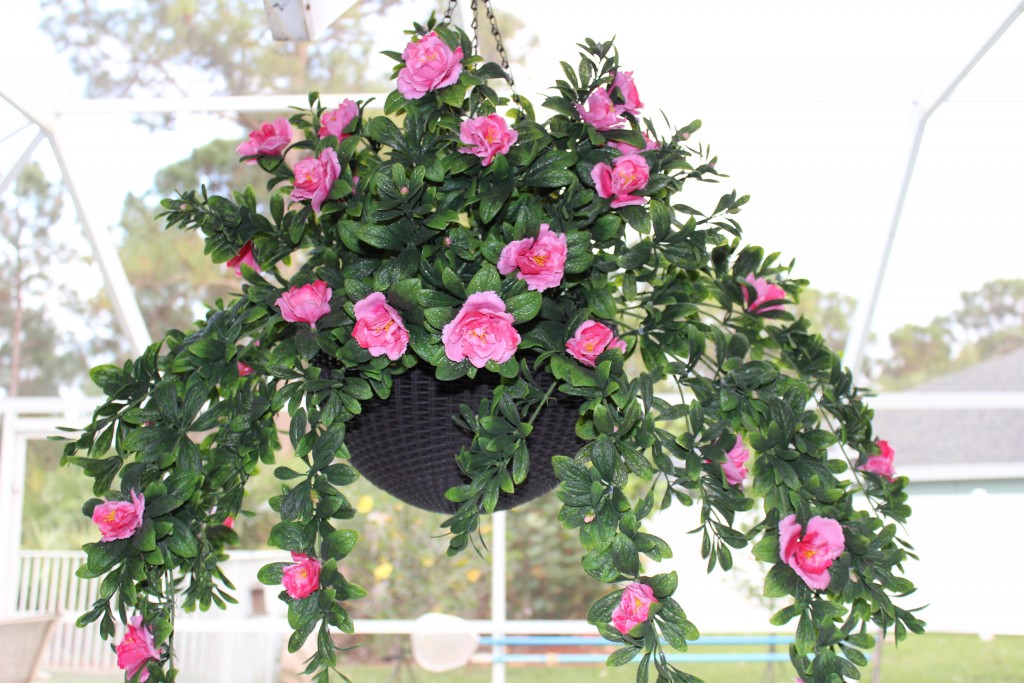
Friday is finally here and so is our #1 video tutorial of 2014! The DIY Hanging Basket with Artificial Azaleas was a real crowd-pleaser this year and it is easy to see why. With this tutorial you will be able to enjoy all the beauty of a gores floral hanging basket without the chore of sweeping beneath it every week. This project is super easy to do and our video walks you step-by-step through the process. Before you can get started though, you must first gather your supplies.
Supplies:
- 2 Artificial Azalea Hanging Plants
- 2 Artificial Azalea Bushes
- Hanging Basket
- Large Block of Florist Foam
- Floral Tape
- Serrated Knife
- Spanish Moss
Step 1:
First, we must fill the hanging basket with floral foam. Take your serrated knife and shape your blocks of foam until it fits snugly down into the basket. The foam should end at least an inch and a half below the rim of the basket so we can layer moss on top of it in a later step. For our example, I shave the bottom of the block into a domed shape to mimic the shape of the basket.
Step 2:
Place your shaved piece of foam into your hanging basket and tape it into place with clear floral tape in a crosshatched design.
Step 3:
Using your knife, cut holes into your foam at an angle. Watch our video to see exactly where we placed these holes. Two are in the center of the foam, angled at opposite directions. Two more are at perpendicular angles for the additional stems.
Step 4:
Insert your artificial azaleas into the holes you created. These azaleas have a jagged edge along the stem that helps them grip into the foam better. If you feel it is needed, you can always secure then a bit more with the addition of some hot glue, but we did not find that to be necessary.
Step 5:
Use the wire that is in the center of each branch to manipulate the individual branches of all four plants. Spread them apart until the whole basket has flowers evenly distributed. Once you are happy with the coverage you have, cover up any exposed foam with some spanish moss or other greenery of your choice.
Step 6:
Hang your hanging basket where you can show it off to friends and family. Once it is in place, give a final shaping to ensure proper balance and stand back to admire what you made!
That is all there is to it. You have just created a quick and beautiful hanging basket that will enhance curb appeal and stay looking great for years to come. We placed ours by the pool and are so relieved not to have to fish flowers out with a skimmer every time we want to go for a swim. Of course, if you are not in love with azaleas, you could fill your hanging basket with any artificial flowers you choose.
Check Out All the Videos in Our Top 5
1 2 3 4 5
About Philip Travers
Twitter •

[…] 5 Best Video Tutorials of 2014: #1 DIY Azalea Hanging BasketStock Up During Our Artificial Flower Stem Sale […]